A closer look at Active Hours in Windows 10
Active Hours is a new update-related feature of the upcoming Anniversary Update for Windows 10 that is already available in the latest Insider Build.
The main idea behind the feature is to make operating system updates less annoying by preventing automatic restarts of the system during active hours.
The Internet is filled with user reports that Windows restarted their system automatically after downloading Windows Updates, and that they lost work in the process or suddenly found themselves with a new version of Windows without them having a say in the matter.
While it is recommended to set Windows Update to notify you about new updates but not install them automatically, so that you have the greatest control over the updating, the default is to download and install updates automatically.
Active Hours
Active Hours don't change that behavior, but they add a mechanic to the Windows 10 operating system that makes sure users are not disturbed by reboots during active hours.
Active Hours appears to be enabled by default.
Configuring Active Hours in Windows 10
Use Windows-I to open the Settings application in Windows 10, and open Update & security when the application opens.

There you find listed "change active hours" under Update settings. If you don't find the option there, Active Hours are not enabled. If that is the case skip this step and go straight to the Registry and Group Policy sections below.
When you click on the link, Windows displays the current start and end time based on the selected time zone. On the screenshot below, you find them enabled from 8:00 in the morning to 17:00 in the afternoon.
Note: The length is limited to a maximum of ten hours.
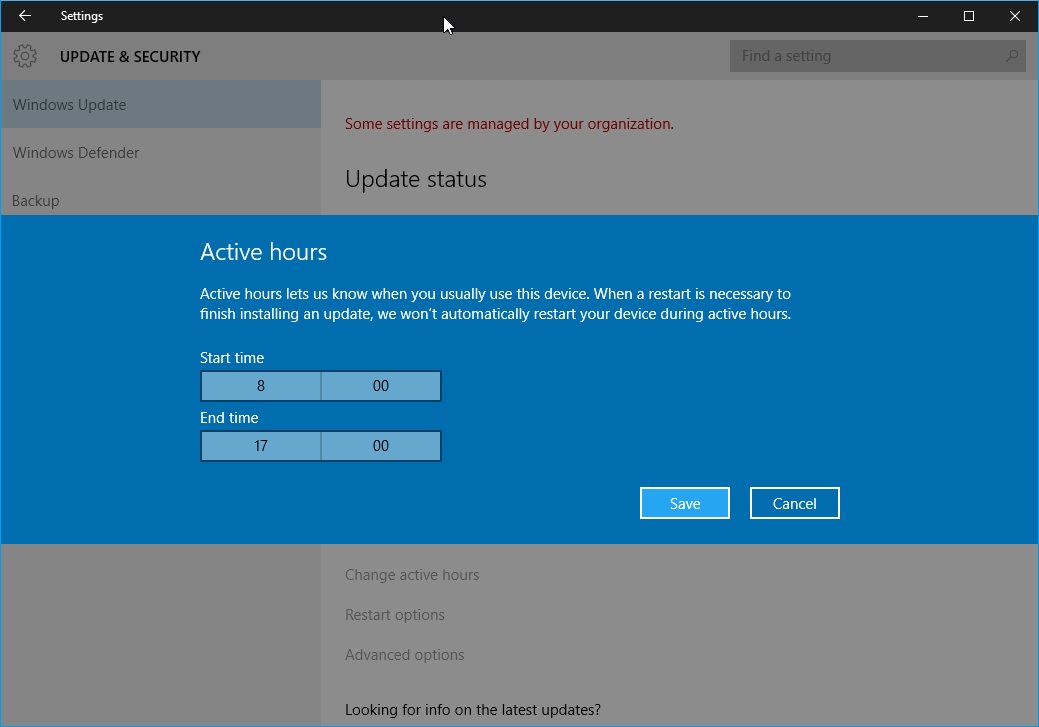
Select a different start and end time (the interface may use a 24 or 12 hour format depending on system settings) and click on the save button afterwards.
You find a second option of interest underneath "update settings". The "restart options" link provides you with options to use a custom restart time that allows you to override active hours on the system.

Flip the switch to on first, and set time and day you want the PC to restart to install updates on the device.
Active Hours and Group Policy
The Group Policy is only available if you run a Pro, Educational or Enterprise version of Windows 10. It is not available as part of the Home version of the operating system.
If you run the Home version, skip this part and jump straight to the Registry part below.
Tap on the Windows-key, type gpedit.msc and hit enter to load the Group Policy Editor. Use the tree hierarchy on the left to navigate to the following section: Local Computer Policy > Computer Configuration > Administrative Templates > Windows Components > Windows Updates.
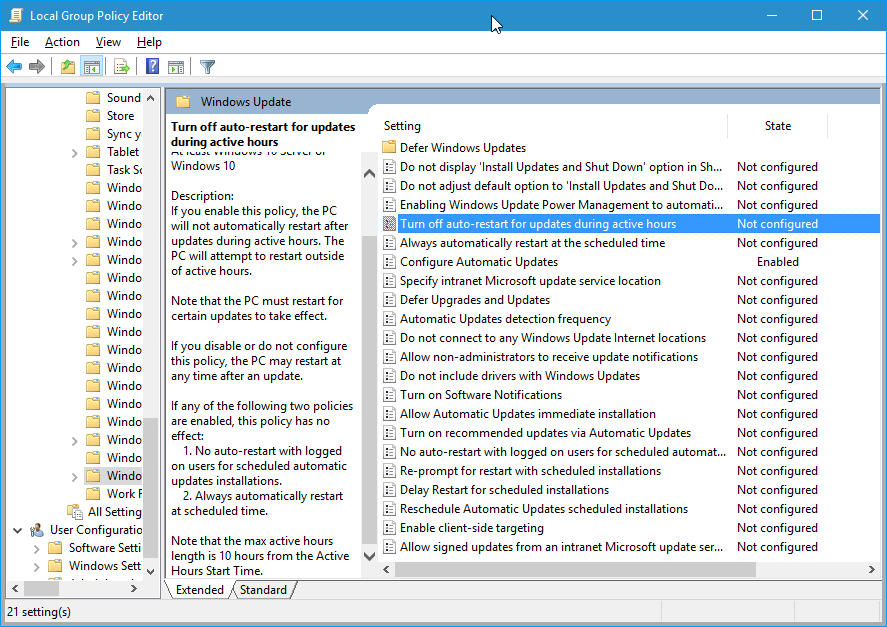
There you find listed the new "Turn off auto-restart for updates during active hours" policy. Double-click on the policy to configure it.
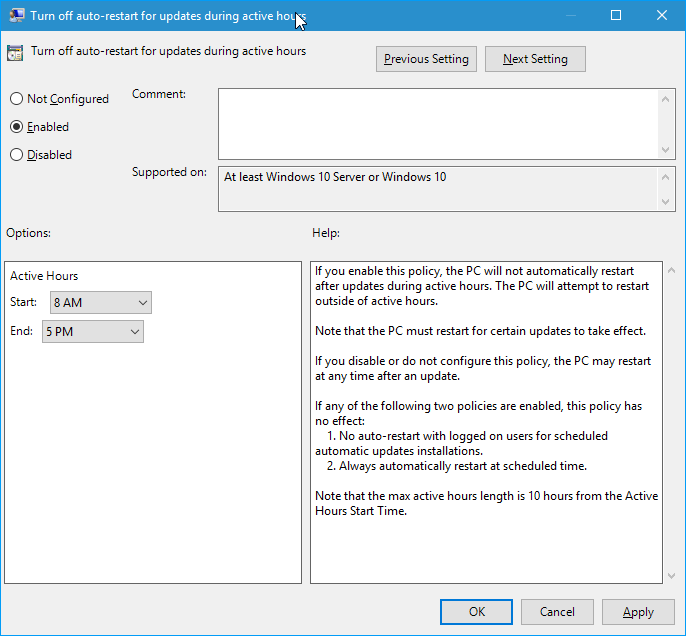
Set it to enabled, and change the start and end time for the feature. Please note that you get a 12-hour system displayed in the Group Policy currently regardless of how time is displayed on the system itself.
The policy has no effect if either of the following policies are enabled:
- No auto-restart with logged on users for scheduled automatic update installations.
- Always automatically restart at scheduled time.
Active Hours and the the Registry
You find options to configure the feature in the Windows Registry. This is the best option for Home users to change it, e.g. disable or enable the feature.
- Tap on the Windows-key, type regedit.exe, and hit enter.
- Confirm the UAC prompt.
- Navigate to the following key using the tree hierarchy on the left: HKEY_LOCAL_MACHINE\SOFTWARE\Microsoft\WindowsUpdate\UX\Settings
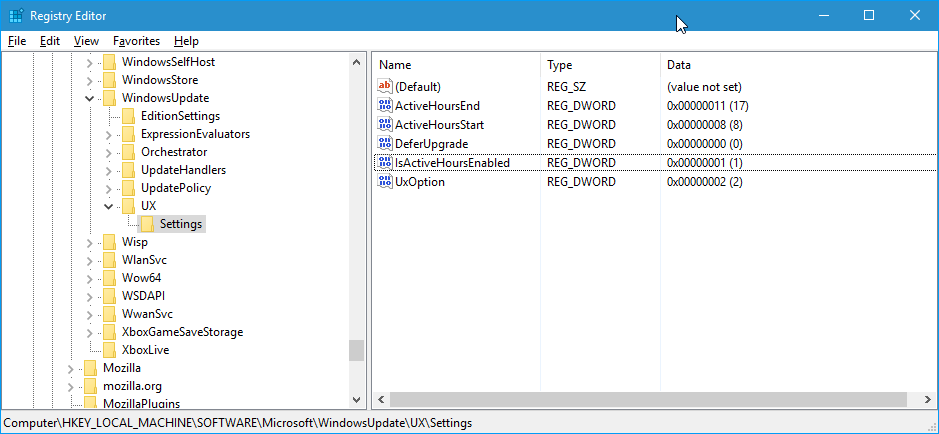
The following options are provided here:
- ActiveHoursEnd: defines the end time of the feature.
- ActiveHoursStart: defines the start time of the feature.
- IsActiveHoursEnabled: if set to 1, the feature is enabled. If set to 0, it is disabled.
If you want to change the starting or end hour of the feature, double-click on one of the entries. Switch to a decimal base on the prompt that opens, and enter the starting hour using the 24 hour clock system.
Please note that you cannot add minutes in the Registry only full hours.